The WordPress Fox LMS is an advanced and powerful plugin to create and manage courses and lessons for your website visitors. In this detailed article, we will learn how to create courses for your educational content with the Fox LMS plugin. So, let’s begin.
Installing the Fox LMS plugin #
At first, of course, you need to download and install the Fox LMS plugin on your WordPress Dashboard.
To do so, you need to log in to your account on the Fox LMS website. Then, you can install the plugin on your WordPress Dashboard by uploading the product zip file on the Plugins page. Please check the article about the Plugin Setup and Activation to get all the necessary information about the plugin installation process.
Creating a Fox LMS Course #
Once you have installed the Fox LMS plugin zip file, it is high time to create a course and manage its settings.
Adding an LMS Course #
Please follow these simple steps to add a new course with the Fox LMS plugin.
- Head to your WordPress Dashboard > Fox LMS plugin.
- Click on the Courses page.
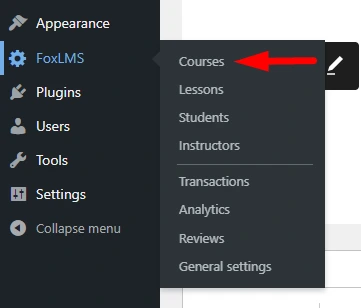
- Click on the Add New button.
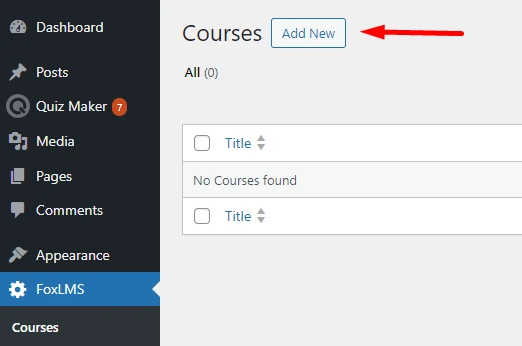
Once you have added a new LMS Course, it is high time to configure its settings.
Configuring LMS Settings #
Builder Tab #
Firstly, you need to write a Title for the LMS Course. Then, add sections with the lessons.
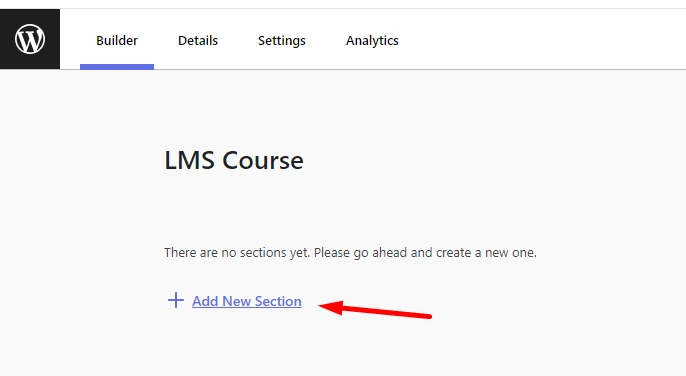
Then, follow these simple steps.
There are three options you can choose from when adding a new section: Add a Lesson, Select from existing lessons, and Add Quiz․

- Add a Lesson: This option is for those users, who haven’t created any lessons yet. You can click on it, add a new lesson, and set a name for it.
- Select from existing lessons: You can select a lesson from the ones you have already created on the Lessons page of the plugin.
- Add Quiz: Also, you can add a quiz by selecting from the quizzes you have already created with the WordPress Quiz Plugin. You can learn more about creating a quiz for LMS in the following article.
Once you have created all the sections of your LMS course and added lessons to it. It is high time to configure the remaining settings of the LMS course.
Details Tab #
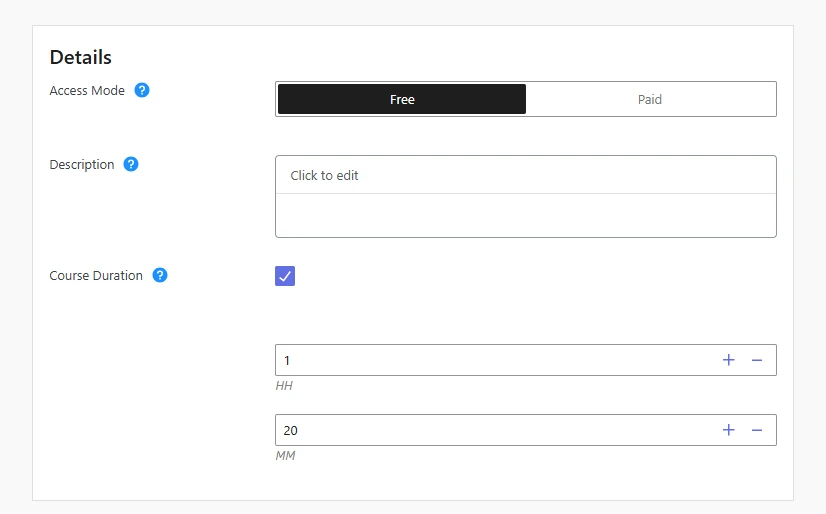
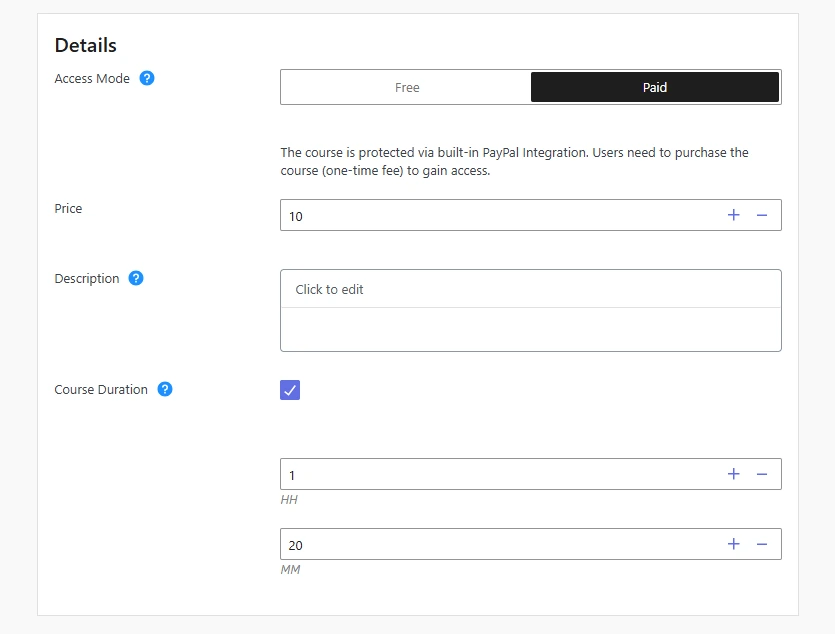
There are 3 settings you need to configure when creating an LMS Course.
- Access Mode: You can specify the visibility of the course. You can set it like this:
Free: In this case, the course is protected. The students need to register and be enrolled to access the content.
Paid: The course is protected via built-in PayPal Integration. Users need to purchase the course (one-time fee) to get access to the course.
- Price: In case the course is paid, you need to specify the price of the course.
- Description: You can write a description of the course. You will be able to make the text bold, and italic, add bullet points, and message variables, and configure the styling of the description text.
- Course Duration: You can tick this option and specify the course duration by hours and minutes.
Settings Tab #
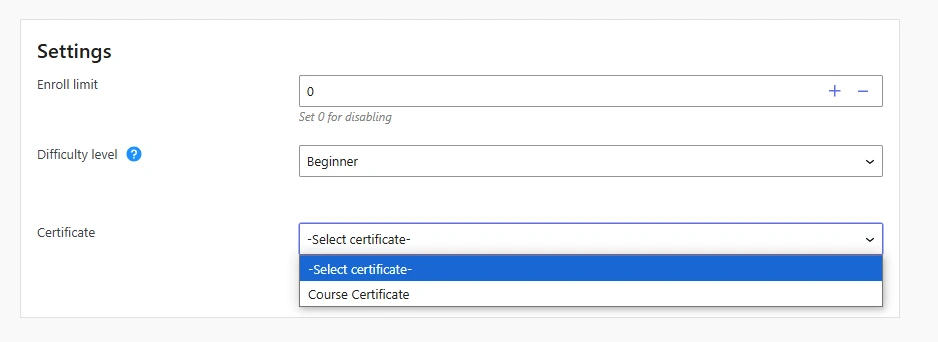
On the Settings Tab, you need to configure the following settings.
- Enroll limit: You can set a limitation on the number of people who can take the course. For example, if you set 5, no more than 5 people will be able to be enrolled in the course.
- Difficulty level: With the help of this option, you can set a difficulty level for All Levels, Beginner, Intermediate, and Expert.
- Certificate: You can add the Certificate you have created to the course if you have installed the FoxLMS Certificate addon.
Analytics #
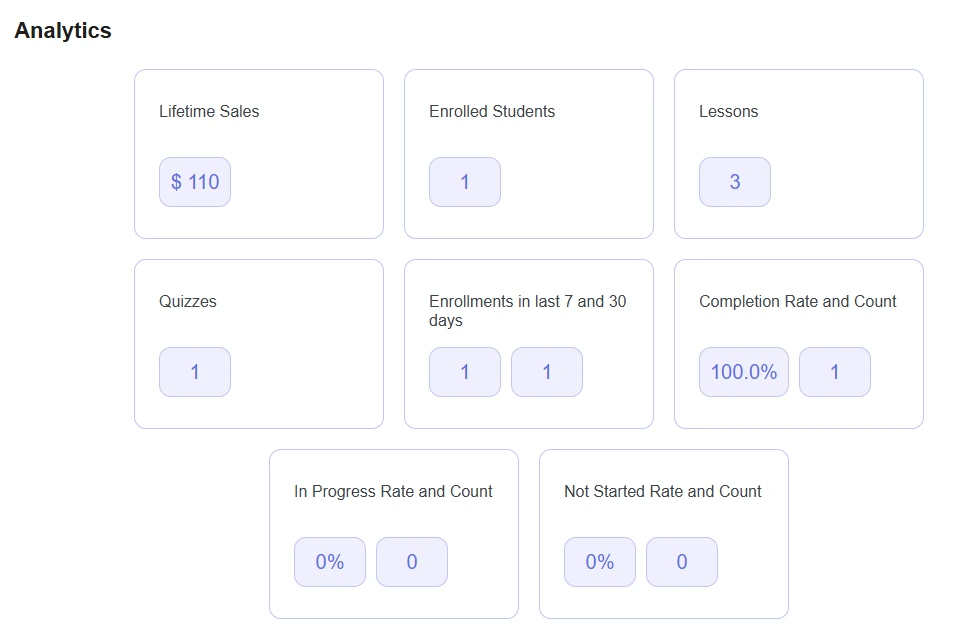
The last Tab available for the Course is Analytics. There you can see info about the sales, the number of enrolled students, lessons and quizzes, etc.
So, in this article, we learned how to create a course with the FoxLMS Plugin. To get more details about the process of course creation, make sure to check the WordPress FoxLMS General Overview video tutorial.


